I teach yoga four nights a week. That means I either have to eat something before I go or wait till I come back home. If I wait till I come home I'm tired and don't want to spend too much time cooking. This is where this next recipe comes into the picture. I found this recipe the other day on Pinterest and thought it sounded good. My favorite part about this dish (aside from the fact that it's really tasty) is that it took less than 30 minutes to make it from start to finish.
You can find the original recipe here.
In the fall and winter I made lots of dishes with winter squash. Now that spring is officially here with summer fast approaching, I'm looking to try out a whole slew of new dishes with summer squash. I love squash. It's yummy. And here's another bonus: it's really good for you too. See what the folks over at Livestrong have to say about it.
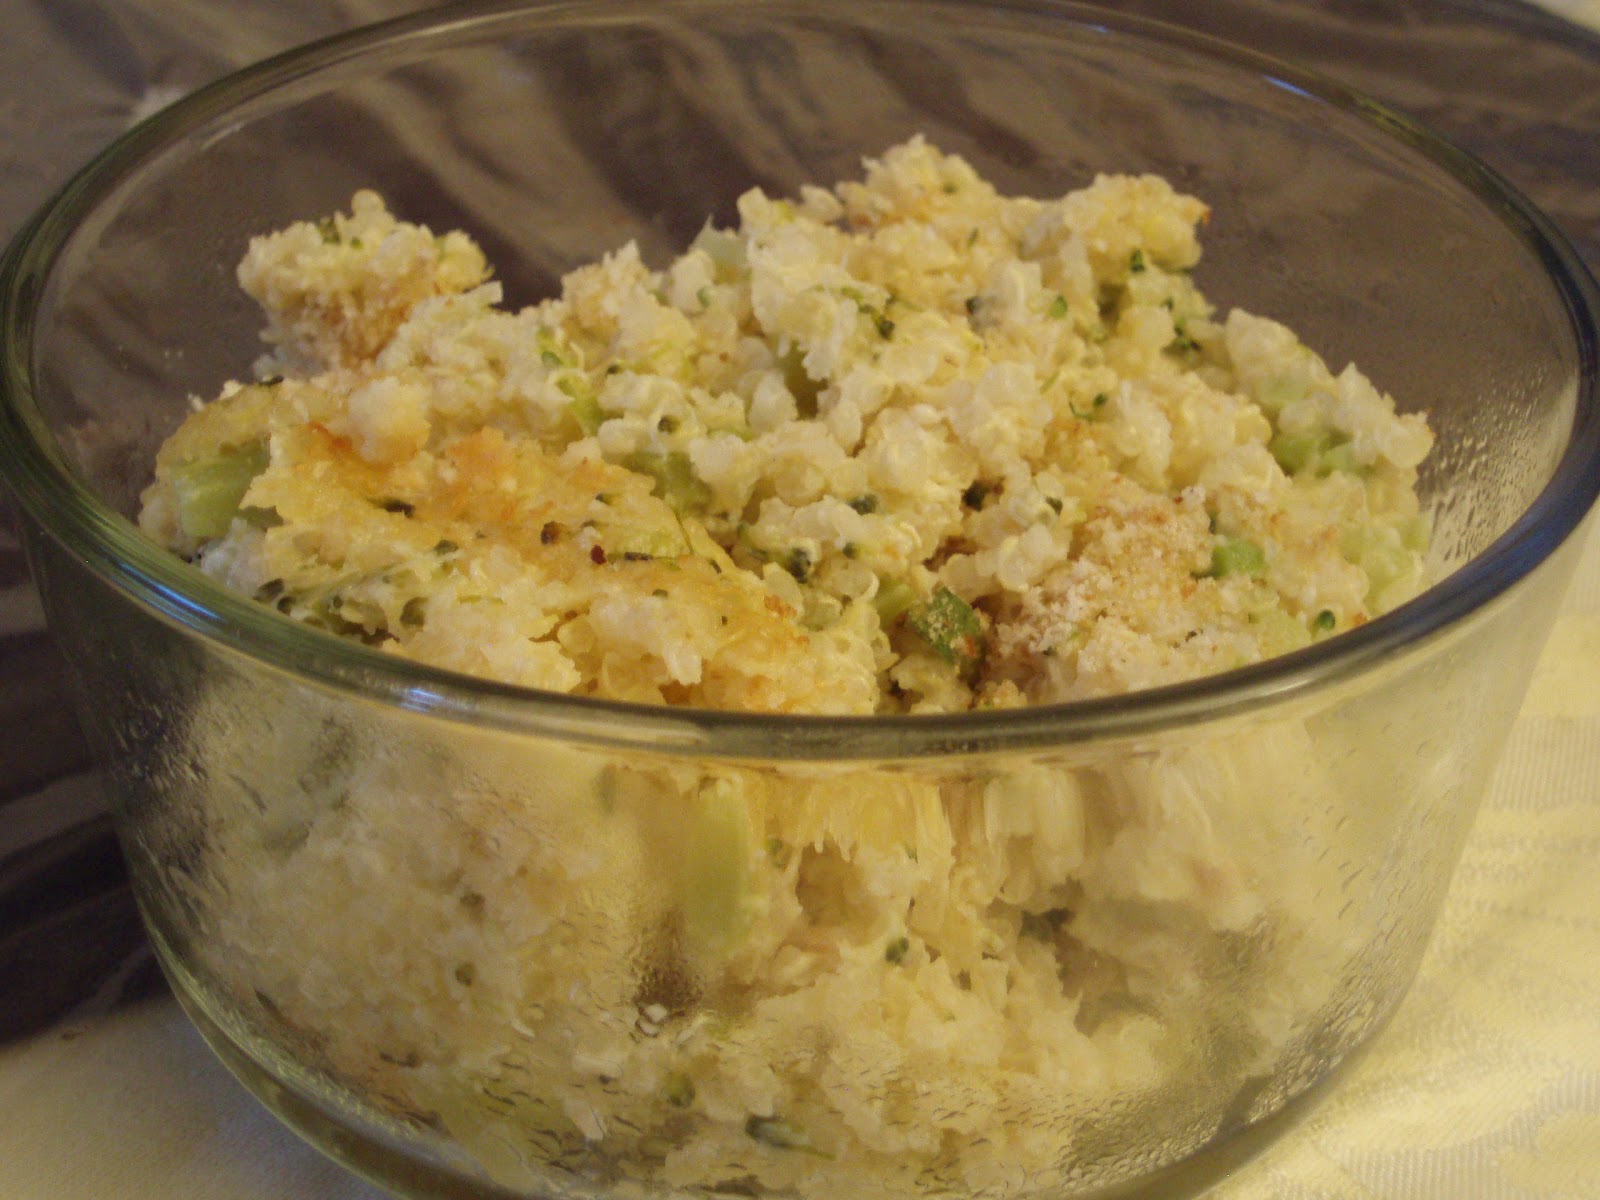
ZUCCHINI CAKES
INGREDIENTS:
1 large zucchini, grated
1 large egg
1 cup panko bread crumbs
Salt/pepper to taste
1 tbsp Adobo spices
1/2 cup Parmesan cheese, grated
DIRECTIONS:
1. Remove excess liquid from freshly grated zucchini by placing them between paper towels and squeezing.
2. In a large bowl, combine all the ingredients. Mix thoroughly.
3. Heat a large pan on medium, and spray with Pam. Shape spoonfuls of the zucchini batter into 2-inch (diameter) patties, and drop onto the sizzling pan. Cook each side for about a minute and a half, or until the outside is golden brown.
4. Finish the cakes off in the oven — stick them on a baking pan and broil them for 1-2 minutes.
5. Serve hot, alone or with ranch dressing.
PERSONAL NOTES:
As I mentioned above, this was an easy and quick dish to put together. I will DEFINITELY make these again.
The directions state to remove excess water from the zucchini but I didn't see a need for that. There just didn't seem to be any excess water.
Instead of using Adobo spices I just used an all-purpose season salt. It worked fine.
Overall this was tasty as-is. When I make it next time I'll add 2x the amount of zucchini and cut back on the breadcrumbs by at least 1/3 cup. I think it needs more zucchini in it, less bread.
Showing posts with label dinner. Show all posts
Friday, April 20, 2012
Thursday, April 12, 2012
Tofu Lasagna with Caramelized Calabaza
Leave it to me to get a little bored with the same-old, same-old recipes to start creating my own concoctions.
That's right, I combined a couple of recipes for this one. Frankly, it's about time. And lucky for me it turned out GREAT! I used the recipe for the caramelized calabaza (winter squash) from here and fused it with an old recipe for tofu-stuffed shells (the recipe for which I cannot find. Boo). So I improvised and figured out what went into the tofu mixture. It originally came from an old tofu recipes book I had. Well, actually I still have the book I just can't seem to locate it.
The combination of flavors and textures makes the work that goes into making this totally worth it. Of course, if you really wanted, you could skip the whole tofu filling part and just use regular ricotta cheese as you would in a traditional lasagna. But, I think the tofu adds a nice (different) dimension to it.
TOFU LASAGNA
For the caramelized squash topping:
9 Tbs. unsalted butter
1 kabocha, calabaza, butternut squash or any winter squash, 2 1/2 to 3 lb., peeled, seeded and cut into 1-inch cubes
2 Tbs. sugar
1/2 cup chicken or vegetable broth
Salt and freshly ground pepper, to taste
3 Tbs. finely diced shallots
1/8 tsp. freshly grated nutmeg
1 Tbs. minced fresh sage
1 tsp. fresh lemon juice
2 Tbs. minced fresh flat-leaf parsley
1 lb. fresh pasta sheets, cooked per boxed instructions
1 oz. Parmigiano-Reggiano cheese, grated
For the tofu filling:
1 16oz block extra firm tofu, drained
Oregano, parsely, basil to taste
salt to taste
fresh chopped spinach (optional)
1 tsp lemon juice
Preheat oven to 350 degrees.
Follow the directions for the squash mixture here from my previous post.
In a food processor, mix together the tofu mixture until smooth. Cook pasta sheets as per the directions on the box. Butter a 9x13 baking pan so it's well greased. Cover the bottom with pasta and fill with the tofu mixture. Continue layering until the mixture is finished. It's important to top the lasagna with the tofu mixture - otherwise the top pasta layer will get too crunchy as it bakes.
Bake for about 20 minutes (you may want to keep it in a little longer - but start checking it at 20 minutes. It's probably done.) and let sit for 10 minutes before serving.
Top with the caramelized squash mixture, sprinkle with parmesan cheese to taste and serve. Enjoy!
This is a fun dish to serve and to eat (I can't lie, it's really tasty). But I also have to come clean - it's work. It takes a while to get everything together. It probably took me over an hour to complete the whole thing. You can probably make the squash mixture while the lasagna is in the oven. That would help cut down on time. So while I really like this meal and the combination of flavors and textures, I just won't be making it a lot. I like easier dishes to make. However, I do end up with leftovers and therefore meals for the following day or so are covered.
That's right, I combined a couple of recipes for this one. Frankly, it's about time. And lucky for me it turned out GREAT! I used the recipe for the caramelized calabaza (winter squash) from here and fused it with an old recipe for tofu-stuffed shells (the recipe for which I cannot find. Boo). So I improvised and figured out what went into the tofu mixture. It originally came from an old tofu recipes book I had. Well, actually I still have the book I just can't seem to locate it.
The combination of flavors and textures makes the work that goes into making this totally worth it. Of course, if you really wanted, you could skip the whole tofu filling part and just use regular ricotta cheese as you would in a traditional lasagna. But, I think the tofu adds a nice (different) dimension to it.
TOFU LASAGNA
INGREDIENTS:
For the tofu filling:
DIRECTIONS:
Follow the directions for the squash mixture here from my previous post.
Bake for about 20 minutes (you may want to keep it in a little longer - but start checking it at 20 minutes. It's probably done.) and let sit for 10 minutes before serving.
Top with the caramelized squash mixture, sprinkle with parmesan cheese to taste and serve. Enjoy!
PERSONAL NOTES:
This is a fun dish to serve and to eat (I can't lie, it's really tasty). But I also have to come clean - it's work. It takes a while to get everything together. It probably took me over an hour to complete the whole thing. You can probably make the squash mixture while the lasagna is in the oven. That would help cut down on time. So while I really like this meal and the combination of flavors and textures, I just won't be making it a lot. I like easier dishes to make. However, I do end up with leftovers and therefore meals for the following day or so are covered.
By the way, this dish can also be made as tofu stuffed shells with the same caramelized squash on top. That would be tasty too!
Wednesday, March 7, 2012
Mix-n-Match: Fried Quinoa Bites with Ka-Pow Sauce
Cooking is getting dangerous. This is two days in a row now I've used the fryer. Two days in a row I produced outrageous results from my efforts. It's dangerous because of how good it all tastes, but how bad it is for the waistline. Boo.
Today we're talking about a combination of two recipes: Baked Quinoa & Cheese meets Ka-Pow Shrimp.
I had leftovers from the baked quinoa dish so I decided to scoop out little balls of the stuff and drop them in the deep fryer for a couple minutes.
Here are the results...
Fried Quinoa Bites & Ka-POW Sauce:
To make this dish...
Follow the recipe for the Baked Quinoa and Cheese here and then go to the Ka-Pow Shrimp recipe to get the mix for the breading as well as the Sriracha hot dipping sauce. YUM!
Tuesday, March 6, 2012
Ka-POW Shrimp!
My mouth is still buzzing from this hot-n-spicy dish. Holy Moly. It is SO good!
This recipe has been floating around on Pinterest for a while and I added it to my "Recipes to try" board several weeks ago. Actually, it may be one of the very first recipes I added. Anyhow, it is worth making.
At first, I looked at the recipe and almost gave it the thumbs-down because it involved frying up the shrimp. I'm not crazy about anything fried. If it can be baked instead, I will go that route. But for some reason, I decided to give the frying a whirl. For the record, this is actually the first dish I ever used a fryer for. Can you believe it?
SPICY "BANG BANG" SHRIMP
INGREDIENTS:
1 lb. medium shrimp, peeled and deveined
1/2 cup mayonnaise
4-5 teaspoons chili garlic sauce, such as Sriracha sauce
1 teaspoon granulated sugar
1 teaspoon rice vinegar
1 egg, beaten
1 cup milk
1/2 cup all-purpose flour
1/2 cup panko breadcrumbs
1 teaspoon salt
1/2 teaspoon ground black pepper
1/4 teaspoon onion powder
1/4 teaspoon garlic powder
1/4 teaspoon dried basil
For frying:
8 to 12 cups vegetable oil
DIRECTIONS:
This recipe has been floating around on Pinterest for a while and I added it to my "Recipes to try" board several weeks ago. Actually, it may be one of the very first recipes I added. Anyhow, it is worth making.
At first, I looked at the recipe and almost gave it the thumbs-down because it involved frying up the shrimp. I'm not crazy about anything fried. If it can be baked instead, I will go that route. But for some reason, I decided to give the frying a whirl. For the record, this is actually the first dish I ever used a fryer for. Can you believe it?
SPICY "BANG BANG" SHRIMP
INGREDIENTS:
For the sauce:
For the egg mixture:
For the breading mixture:
DIRECTIONS:
Combine all ingredients for the sauce in a small bowl; cover and set aside.
Combine beaten egg with milk in shallow bowl; set aside.
Combine flour, panko, salt, black pepper, onion powder, garlic powder, and basil in another shallow bowl; set aside.
Bread the shrimp by first coating each with the breading mixture. Dip breaded shrimp into the egg and milk mixture, and then back into the breading. Arrange the coated shrimp on a plate and pop them into the fridge for at least 20 minutes. This step will help the breading to stick on the shrimp when they are frying.
Heat oil in deep fryer to 350 degrees F. Use amount of oil required by your fryer.
When oil is hot, fry shrimp 2 to 3 minutes or until golden brown. Drain on rack or paper towels.
When all shrimp has been fried, drop the shrimp into a large bowl. Spoon about 1/4 cup of sauce over shrimp and stir gently to coat.
PERSONAL NOTES:
As I mentioned above, this is the first time I ever used a fryer. It turned out great - it was so easy to use! But don't get me wrong; I do NOT plan to be frying up my food in the future (at least not consistently so).
The sauce was HOT. If you don't like a lot of heat with your food, do yourself a favor and go lighter on the sriracha sauce. You can always add more later.
Instead of using real mayonnaise, I chose to use Vegennaise. Real mayo just grosses me out. Always has.
And despite the steps involved here, it really is an easy recipe to follow. The results are well worth the efforts. I will be making these again (and possibly trying them out in the oven instead of fryer next time :)
Sunday, March 4, 2012
Quinoa Pasta with Caramelized Squash and Fresh Herbs
We're pretty much bringing up the rear of the winter season, especially in terms of winter squash. But as you may (or may not know) I'm kicking in my heels to hold on as long as possible. This is one more squash recipe I had to make before it was too late. Am I glad I did... this is just one superb dish that I have to share.
See the original recipe here.
For me it's the combination of flavors that really gets me. The caramelized sweet with the texture of the squash mixed with the savory of the sauteed onions (and garlic since I added it) and sage over pasta just makes this a huge hit. YUM!
Unfortunately though, I was unable to talk my husband into trying this one. He missed out big time; this is great. You won't be sorry!
QUINOA PASTA with CARAMELIZED SQUASH & FRESH HERBS
INGREDIENTS:
9 Tbs. unsalted butter
1 kabocha or butternut squash, 2 1/2 to 3 lb., peeled, seeded and cut into
1-inch dice
2 Tbs. sugar
1/2 cup chicken or vegetable broth
Salt and freshly ground pepper, to taste
3 Tbs. finely diced shallots
1/8 tsp. freshly grated nutmeg
1 Tbs. minced fresh sage
1 tsp. fresh lemon juice
2 Tbs. minced fresh flat-leaf parsley
1 lb. fresh pasta sheets, cut into 2-inch squares (see related recipe at left)
1 oz. Parmigiano-Reggiano cheese, grated
DIRECTIONS:
PERSONAL NOTES:
I didn't have fresh parsely so I used the dried stuff. And I forgot the lemon juice. Although frankly, I'm not sure I'd use it going forward. This dish is perfect without it.
So good!
See the original recipe here.
For me it's the combination of flavors that really gets me. The caramelized sweet with the texture of the squash mixed with the savory of the sauteed onions (and garlic since I added it) and sage over pasta just makes this a huge hit. YUM!
Unfortunately though, I was unable to talk my husband into trying this one. He missed out big time; this is great. You won't be sorry!
QUINOA PASTA with CARAMELIZED SQUASH & FRESH HERBS
1-inch dice
DIRECTIONS:
In a braiser over medium-high heat, melt 3 Tbs. of the butter. Add the squash in a single layer and cook, without stirring, until browned underneath, about 6 minutes. Stir the squash and cook until browned on all sides, about 4 minutes more. Add the sugar, broth, salt and pepper, cover and cook until the squash is tender, 2 to 3 minutes. Uncover and continue cooking, stirring occasionally, until the liquid evaporates and the squash is dark brown and glazed, 2 to 3 minutes more. Transfer the squash mixture to a bowl.
In the same pan over medium-high heat, melt the remaining 6 Tbs. butter until light brown spots appear, about 2 minutes. Add the shallots, nutmeg and sage and cook, stirring constantly, until the shallots begin to soften, about 1 minute. Remove the pan from the heat and stir in the lemon juice and parsley. Season with salt and pepper, then stir in the squash.
Meanwhile, bring a large pot of salted water to a boil over high heat. Add the pasta and cook, stirring occasionally, until al dente, about 3 minutes. Drain, reserving 1/2 cup of the cooking water. Add the pasta and the reserved cooking water to the squash mixture and toss to combine.
Transfer the pasta to a warmed large, shallow bowl and sprinkle with some of the cheese. Serve immediately and pass the remaining cheese alongside. Serves 4 to 6.
PERSONAL NOTES:
I didn't have fresh parsely so I used the dried stuff. And I forgot the lemon juice. Although frankly, I'm not sure I'd use it going forward. This dish is perfect without it.
So good!
Tuesday, February 28, 2012
Scalloped Potatoes
In an effort to use some potatoes I had lying around, I found this recipe to make scalloped potatoes. As it turned out, I had all the ingredients. Well...kind of had the ingredients. Actually, I had to substitute some things because I didn't have everything the recipe called for. I'll explain in a little bit...
SCALLOPED POTATOES
INGREDIENTS:
2 tablespoons butter
3 tablespoons all-purpose flour
1 teaspoon salt
1/4 teaspoon pepper
1-1/2 cups fat-free milk
1/2 cup shredded reduced-fat cheddar cheese
1-3/4 pounds potatoes, peeled and thinly sliced (about 5 medium)
1 medium onion, halved and thinly sliced
DIRECTIONS:
In a small nonstick skillet, melt butter. Stir in the flour, salt and pepper until smooth; gradually add milk. Bring to a boil. Cook and stir for 2 minutes or until thickened. Remove from the heat; stir in cheese until blended.
Place half of the potatoes in a 1-1/2-qt. baking dish coated with cooking spray; layer with half of the onion and cheese sauce. Repeat layers.
Cover and bake at 350° for 50 minutes. Uncover; bake 10-15 minutes longer or until bubbly and potatoes are tender.
Yield: 6 servings.
PERSONAL NOTES:
Well... a few things: As I was preparing to make this dish, I discovered I had no more flour. NONE. So I had this idea of using ground cornmeal as a substitute. The same stuff I use to make polenta.
Then I used fat free half and half because I had it on hand. And instead of using cheddar cheese (because again, I had none), I chose to use Monterey Jack cheese. Then I doubled the amount of cheese.
Finally, for the onion I used a bunch of scallions. Again, I used them because I had them. Oh, the potatoes. I used 2 new potatoes and 2 sweet potatoes. As I said, these were all items I had on hand.
As I was mixing the milk/cheese sauce I noticed that the mixture was super soupy. So I added in another tablespoon of cornmeal. Then once it thickened, it thickened in a serious way. Like, maybe I shouldn't have used that extra tablespoon of cornmeal. Anyway... I put the whole kit and caboodle together and it looked great.
Once it baked up, the sweet potatoes and cornmeal gave it a golden/orange color. And while the sauce thickened to a cornbread-like consistency, the whole dish tasted great. So, I'm not sure these would pass as your traditional scalloped potatoes, but they are really delicious. My husband tested them too and liked them. I'll be making these again.
SCALLOPED POTATOES
INGREDIENTS:
DIRECTIONS:
Yield: 6 servings.
PERSONAL NOTES:
Well... a few things: As I was preparing to make this dish, I discovered I had no more flour. NONE. So I had this idea of using ground cornmeal as a substitute. The same stuff I use to make polenta.
Then I used fat free half and half because I had it on hand. And instead of using cheddar cheese (because again, I had none), I chose to use Monterey Jack cheese. Then I doubled the amount of cheese.
Finally, for the onion I used a bunch of scallions. Again, I used them because I had them. Oh, the potatoes. I used 2 new potatoes and 2 sweet potatoes. As I said, these were all items I had on hand.
As I was mixing the milk/cheese sauce I noticed that the mixture was super soupy. So I added in another tablespoon of cornmeal. Then once it thickened, it thickened in a serious way. Like, maybe I shouldn't have used that extra tablespoon of cornmeal. Anyway... I put the whole kit and caboodle together and it looked great.
Once it baked up, the sweet potatoes and cornmeal gave it a golden/orange color. And while the sauce thickened to a cornbread-like consistency, the whole dish tasted great. So, I'm not sure these would pass as your traditional scalloped potatoes, but they are really delicious. My husband tested them too and liked them. I'll be making these again.
Sunday, February 26, 2012
Artichoke, Kale & Ricotta Pie
If you've been following my posts for any length of time you'll see the ridiculous amount of dessert dishes I make. It's just not normal. After all, it's just me and my husband at home. I'm not feeding a family or an army. I just get swept up in the recipes and visions in my head of all these heavenly delights. You know what that leads to? Me feeling like poo when I've eaten too much of it.
For the record, I don't eat all of it. Far from it. I bring a large chunk of what I make to whatever yoga studio(s) I'm teaching at that day. Luckily for me, not every yogi is into a strict vegetarian (healthy) diet.
That said, I'm seeking to go back to a more mindful and healthy way of eating. Granted, I have to clear the fridge and cabinets of whatever leftover supplies I used, but I'm getting back on track. And what better way to do both than with this next recipe for Artichoke, Kale and Ricotta Pie. (Original recipe is found here).
By the way, it's cooking right now and smells absolutely sinful!
ARTICHOKE, KALE & RICOTTA PIE
INGREDIENTS:
Olive oil
4 eggs, beaten
8 ounces ricotta cheese
4 ounces Parmesan, grated
1 cup canned artichokes, chopped
1 bunch kale, roughly chopped
DIRECTIONS:
Preheat oven to 400°F. Grease a 9-inch cake pan lightly with olive oil. In a large bowl, whisk together the eggs and cheeses. Roughly chop the veggies and add to the cheese/egg mixture. Stir until combined. Pour contents of bowl into the greased cake pan and cook until custard is set, about 40 to 50 minutes. Cool on a wire wrack for 5 to 10 minutes and serve.
PERSONAL NOTES:
This pie didn't need to be in the oven as long as the directions state. I left it in for 40 minutes and checked; it was more than ready to come out. Next time I make this (and I will be making it again because it turned out delicious!) I'll check it at 30 minutes and possibly lower the temperature to about 375 degrees.
As far as the flavor goes, I like putting garlic and onions in almost everything I make and this was no exception. However, I discovered I ran out of fresh garlic. Boo. Happily, I have a good amount of onions on hand so I decided to thinly slice up a couple of shallots. Hooray!
So even though it cooked a little longer than I would have liked, it still came out fantastic. My husband gave it his two thumbs up as well!
Thursday, February 23, 2012
Baked Quinoa and Cheese
You got that right. Baked QUINOA and cheese. Delicious AND (a little bit more) healthy.
Again, I have to credit the peeps at Pinterest for this recipe. Although of course, I re-modeled it to fit my needs :)
This a great dish to make if you want to have lunch ready for the week or for leftovers. If you have a family, this might go pretty quick. It makes 8 servings but you may want seconds. It's super easy to make too. Just bring together all the ingredients and bake. Plus, using quinoa instead of pasta adds a different dimension to it (as well as protein!).
YUM!
BAKED QUINOA AND CHEESE
INGREDIENTS:
DIRECTIONS:
Lightly saute any veggies you would like in this dish.
Cook quinoa to packaged instructions until fully cooked. (About 15 minutes)
Preheat oven to 350 F. Coat 13x9 inch dish( or 8 individual ramekins) with cooking spray.Whisk together eggs and milk in large bowl. Fold in quinoa mixture and cheese. Stir very well and let some of the cheese melt. Transfer to prepared baking dish and if using Panko Crumbs or Bread crumbs add now and bake 30-35 mins, until bread crumbs are browned.
PERSONAL NOTES:
I thought the idea of adding vegetables was great. Since I had some frozen chopped broccoli on hand I decided to add that. Now, the recipe says any vegetable and that you can lightly saute them. I went with what was quick. At first I thought the 10oz package of broccoli would be too much, but it turned out perfectly for the amount of quinoa I made.
Also, I didn't have cheddar so I used Monterey Jack cheese. Frankly, it tastes fine. Better than fine, actually. But I think deep down, cheddar would probably be the way to go. The Monterey Jack cheese is just milder. Although the texture is still creamy.
Oh, and I decided to add 1/4 cup Parmesan cheese. Since the flavor was mild without the cheddar, I thought (and rightly so) the Paresan would add a little more kick.
Friday, February 10, 2012
Roasted Acorn Squash & Quinoa Pasta
This dish is probably the best thing I've come across in a LONG time. Not only is this a keeper, but I think it'll be something I make several more times through the end of the winter.
I made this dish twice. It's based on a recipe found here. I adapted it to make a pasta sauce, baked pasta dish as well as a soup. It's more than fair to say that this is a versatile recipe.
ROASTED ACORN SQUASH & QUINOA PASTA
INGREDIENTS:
1/4 cup onion
1 tablespoon butter or oil
1 garlic clove
2 cups pureed acorn squash (from 1 roasted corn squash)
1/4 cup ricotta cheese
1/4 cup Parmesan
Salt and pepper to taste
2 tablespoons butter
1 tablespoon fresh rosemary (divided in half)
Parmesan for topping
2 boxes elbow pasta (8oz boxes)
DIRECTIONS:
Okay. So I've made this dish twice now. It was delicious both times. Actually, the first time I made the acorn squash mix, I was spooning it out from the food processor right into my mouth. I could have made a meal just out of that alone. It was that good.
That said, I decided to see what else I could make from the original recipe.
Let me rewind for a moment. Since I didn't have pasta shells, I decided to use the quinoa pasta I had which was elbows. I made the acorn squash mix as a sauce.
Then the wheels started turning and I thought that it would make a good baked dish, similar to a macaroni and cheese - in the loosest sense of the phrase.
But then I also thought it would make a great soup if it was thinned out to the right consistency.
Oh - the acorn squash. It's easier to cut through and set up than butternut squash, but once cooked, it's still a little challenging to scoop out the cooked parts. There's probably an easier way to do it, but I find my hands get mighty dirty in the process. Then again, maybe it's good to get the hands dirty now and again ;)
TO MAKE ROASTED ACORN SQUASH SOUP:
Add 1 cup vegetable broth and 1 cup half and half (I used fat free, but the real thing would make it even creamier :) to a large saucepan with the acorn squash mix and simmer for about 30 minutes.
YUM.
I made this dish twice. It's based on a recipe found here. I adapted it to make a pasta sauce, baked pasta dish as well as a soup. It's more than fair to say that this is a versatile recipe.
ROASTED ACORN SQUASH & QUINOA PASTA
INGREDIENTS:
DIRECTIONS:
- To roast acorn squash, cut squash in half and remove seeds. Place cut side down in a pan filled with about a 1/2″ of water. Roast at 400˚ until squash is tender (mine took about 30 minutes.) Remove and let cool. Scoop out the insides and set aside (this can be done the day before as well.)
- Cook pasta according to package (or about 2-3 minutes less to make it al dente).
- In a bowl, stir together the acorn squash, ricotta cheese and Parmesan.
- In a skillet, heat olive oil over medium heat. Finely dice onions and add to pan along with chopped garlic. Cook until onions are translucent and cooked through.
- Add onions/garlic and squash mixture and puree in a food processor till smooth.
- Once everything is ready, spoon squash mixture onto pasta.
- **If you're making the baked version** Preheat oven to 350 degrees. Grease a 9x13 casserole dish. Combine cooked pasta and squash mixture. Put it in the casserole dish and top with either breadcrumbs or parmesan. Bake for 15-20 minutes, just enough to get the top a little crispy.
Okay. So I've made this dish twice now. It was delicious both times. Actually, the first time I made the acorn squash mix, I was spooning it out from the food processor right into my mouth. I could have made a meal just out of that alone. It was that good.
That said, I decided to see what else I could make from the original recipe.
Let me rewind for a moment. Since I didn't have pasta shells, I decided to use the quinoa pasta I had which was elbows. I made the acorn squash mix as a sauce.
Then the wheels started turning and I thought that it would make a good baked dish, similar to a macaroni and cheese - in the loosest sense of the phrase.
But then I also thought it would make a great soup if it was thinned out to the right consistency.
Oh - the acorn squash. It's easier to cut through and set up than butternut squash, but once cooked, it's still a little challenging to scoop out the cooked parts. There's probably an easier way to do it, but I find my hands get mighty dirty in the process. Then again, maybe it's good to get the hands dirty now and again ;)
TO MAKE ROASTED ACORN SQUASH SOUP:
Add 1 cup vegetable broth and 1 cup half and half (I used fat free, but the real thing would make it even creamier :) to a large saucepan with the acorn squash mix and simmer for about 30 minutes.
YUM.
Friday, January 27, 2012
Cheese, Tomato and Basil Muffins
Again, this is a recipe I wish I could say was mine, but it's not. Of course it attracted my attention and of course I had to try it out. It's a good dinner muffin - just beware that it has a pretty strong flavor so you may not want to serve it with anything too overpowering. They also have a wonderful consistency that I can't seem to put my finger on. They're chewy in a non-bready-way, but they're good - really, really good. And they'd be mighty tasty with some butter spread on them too. Just something to think about ;-)
CHEESE, TOMATO & BASIL MUFFINS
INGREDIENTS:
2/3 cup self-rising flour
pinch of salt
1/3 cup & 2 tbsp yellow cornmeal
1/3 cup shredded cheddar cheese
4 tbsp sun-dried tomatoes in oil, chopped
2 tbsp chopped basil
1 egg, lightly beaten
1 1/4 cup milk
2 tbsp extra virgin olive oil
butter to serve
DIRECTIONS:
Preheat oven to 350 degrees and oil 8 muffin tin holes. In a bowl combine flour, salt, cornmeal, cheese, tomatoes and basil. In a separate bowl beat egg, milk and oil. Mix dry and wet ingredients, divide the batter between the muffin holes and scatter over the remaining cheese. Bake for 20-25 minutes. Serve with the butter.
PERSONAL NOTES:
For starters, this recipe made about 10 muffins, not 8. Be prepared to have more batter. I also didn't use sundried tomatoes in oil. Frankly, it wasn't missed. I didn't have them with butter either, but I'm sure they'd be mighty tasty with it.
Oh, they're only about 145 calories per muffin. Sweet!
CHEESE, TOMATO & BASIL MUFFINS
INGREDIENTS:
DIRECTIONS:
Preheat oven to 350 degrees and oil 8 muffin tin holes. In a bowl combine flour, salt, cornmeal, cheese, tomatoes and basil. In a separate bowl beat egg, milk and oil. Mix dry and wet ingredients, divide the batter between the muffin holes and scatter over the remaining cheese. Bake for 20-25 minutes. Serve with the butter.
PERSONAL NOTES:
For starters, this recipe made about 10 muffins, not 8. Be prepared to have more batter. I also didn't use sundried tomatoes in oil. Frankly, it wasn't missed. I didn't have them with butter either, but I'm sure they'd be mighty tasty with it.
Oh, they're only about 145 calories per muffin. Sweet!
Subscribe to:
Posts (Atom)