Showing posts with label cream cheese. Show all posts

Friday, June 15, 2012

Chocolate Caramel Macchiato Pie

This is serious guys.  Chocolate. Caramel macchiato. Pie.  All rolled into one bit of fabulousness.

Tomorrow is the Roaring 20's Lawn Party on Governor's Island.  This will be the first time attending.  For the last 5 years or so I was either working or in a yoga teacher training program.  This year I was determined to BE THERE.

That said, my sister-in-law informed me of a pie contest at the event and encouraged me to register.  So I did.  Then the big question of which pie would I make arose.  I tried experimenting with a few different options, but I'm pretty sure this chocolate caramel macchiato pie is the one I'm going with.  It's YUMMY.  And...it's pretty much all my own creation.  Well - at least the combination of layers involved.  The recipes are all from different places - none I can truthfully say are all mine.

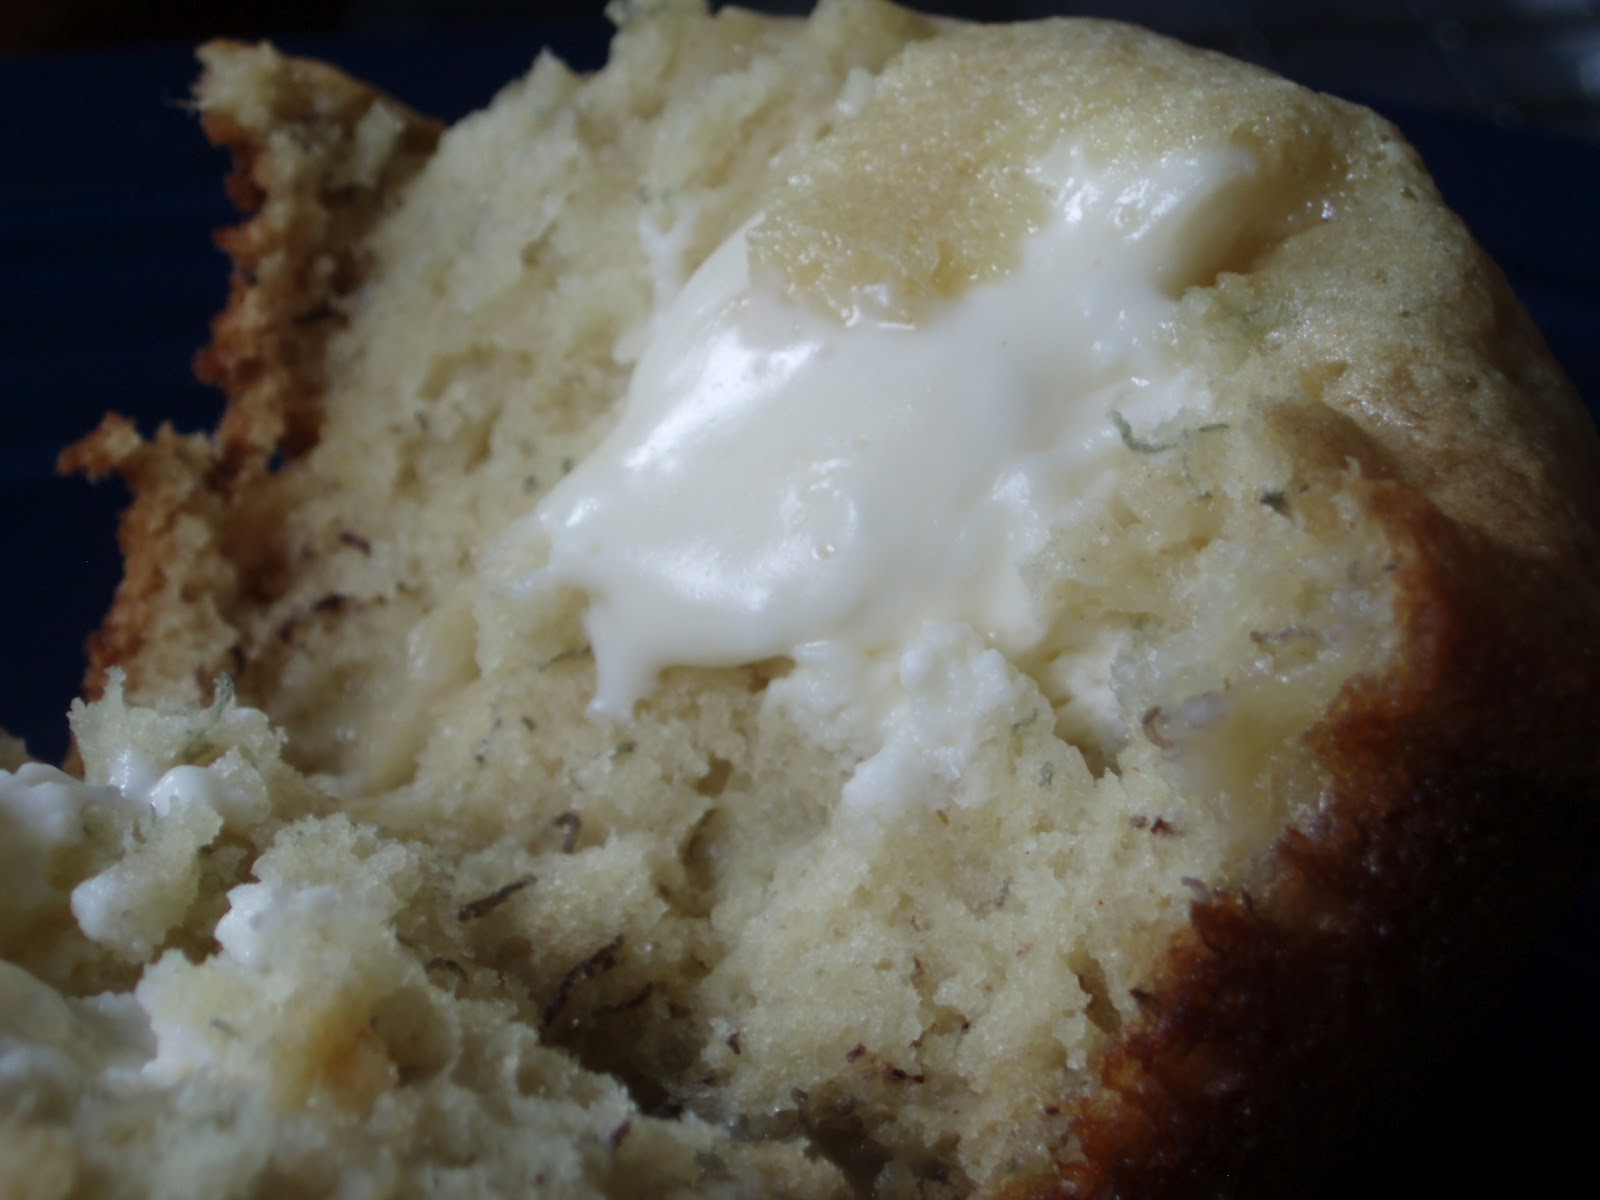
I started with a sugar cookie layer, then espresso chocolate chip, then caramel, topped off with Oreo cookie truffle.

Here it is...

CHOCOLATE CARAMEL MACCHIATO PIE


INGREDIENTS:

For the sugar cookie layer:

1 1/4 C flour
1/2 tsp baking powder
1/4 tsp salt
1/2 C plus 2 TBLS margarine (I use butter sometimes)
1 C granulated sugar
1 Egg
1 tsp vanilla extract

For the espresso chocolate chip layer:

1/2  stick butter, softened
1/2 cup light brown sugar
1 1/2 tablespoons granulated sugar
1/2 of a large egg
1 tsp vanilla extract
3/4 cups all-purpose flour
1/4 teaspoon baking powder
1/4 teaspoon baking soda
1/4 teaspoon salt
1 tsn instant espresso coffee powder
3/4 C semisweet chocolate chips

For the caramel layer:

25 caramel candies
2 Tbls heavy cream

For the Oreo cookie layer:

1 package Oreo cookies
1 8oz. package cream cheese, softened

DIRECTIONS:

For the sugar cookie mix:

Combine flour, baking powder and salt then set aside.  Using a mixer, cream together margarine and 2 C sugar until fluffy.  Beat in eggs, one at a time, then the vanilla. Slowly beat in dry mixture.

For the espresso chocolate chip mix:

Cream the butter with the sugars using an electric mixer on medium speed until fluffy, approximately 30 seconds. Beat in the egg and the vanilla extract for another 30 seconds.

In a mixing bowl, sift together the dry ingredients and beat into the butter mixture at low speed for about 15 seconds. Stir in the espresso coffee powder and chocolate chips.

For the caramel layer:

Place the caramel candies in a small saucepan over medium heat. Add the heavy cream and stir until completely melted. Pour hot caramel mixture over shortbread crust and spread into an even layer. Refrigerate until set, 30 minutes to 1 hour.

For the Oreo cookie truffle layer:

Using a blender or hand held mixer, mix Oreos and cream cheese together. 
Preheat oven to 350 degrees.

Place a layer of sugar cookie mix on bottom of 8x8 pan (or just use a pie pan).  Chill at least 30 minutes (or an hour) then layer on the espresso chocolate chip mix.  Bake for about 10-15 minutes (or until edges turn brown) and allow to cool for about 20 minutes. 

Drizzle on the caramel and chill for about an hour.

Top off pie with the Oreo cookie truffle mix and chill again for about an hour.  Serve and enjoy!

PERSONAL NOTES:


Oh my, are these just yummy!  Since I pretty much put all of these layers together myself I already included any important notes.  If you let the pie sit out for a few minutes before eating it will be a little softer.  Either way it is DELICIOUS! Plus, my husband gave it 2 thumbs up so it passed the test :)

Keeping my fingers crossed it wins tomorrow!!!

Thursday, April 26, 2012

Banana Cream Cheese Breakfast Cakes

Oh look, another muffin recipe. Ha!  Sorry, they're just about my favorite things on this earth.  Thus, I go out in search of new muffin recipes all the time.  As a matter of fact, I should probably think about branching out to include cranberries or other kinds of fruit in my muffins.  Incidentally, that's what brought me to this next recipe. 

Banana breads and banana-things aren't always my favorite - although I love eating bananas by themselves.  However, when I saw this recipe I thought it would be fun.  Plus, I'm actually combining two different recipes to bring this to you. 

The recipe for cream cheese filling can be found here.  The banana muffin part is a recipe I found in the latest Food Network Magazine (May 2012 issue), compliments to Gary Danko.

BANANA CREAM CHEESE BREAKFAST MUFFINS


INGREDIENTS:

1 1/2 cups plus 3 tblsp cake flour
1 1/2 tsp baking soda
1/2 tsp kosher salt
1 stick plus 2 tblsp unsalted butter, room temperature
1 cup plus 6 tblsp sugar
2 tsp vanilla extract
3 large eggs, room temperature
3 very ripe bananas, mashed


DIRECTIONS:

1. Preheat oven to 325 degrees.

2.  Line a 12-cup muffin pan with paper liners. Sift the flour, baking soda and salt into a bowl.

3. Beat the butter, sugar and vanilla with the paddle attachments on medium speed until fluffy, about 5 minutes.  Beat in the eggs, one at a time.  Beat in the mashed bananas until combined.  Add half of the flour mixture and beat on low speed until almost combined, then add the remaining flour mixture and beat until just combined (do not overmix).

4. Drop a small scoop of batter for each muffin.  Drop in about 1 tsp of the cream cheese mixture for each muffin then scoop on the remaining batter over the cream cheese mixture (cups should be about 3/4 full).

5. Bake until a toothpick inserted into the cake (not the filling) comes out clean, 20-35 minutes. Transfer the pan to a rack and let cool about 15 minutes, then remove the cakes to the rack to cool completely.


PERSONAL NOTES:

The directions for the cream cheese mixture in the magazine seemed so involved, I went back to the cream cheese filling I used for other muffins.  It was a good decision, I like the way they came out.  I love biting into muffins or cupcakes only to find a surprise in the middle.  Yum!

Oh, and I didn't bake the muffins all that long... probably only 20 minutes - max.  If I baked them for 35 they would have burned.  So my recommendation is to check them at 20 minutes and see if they need more time or not.


Sunday, February 12, 2012

Valentine's Truffles

I began experimenting with this at Christmas time.  You can find those results (and recipe) here.  These are some of the yummiest and easiest treats you can make.  And with Valentine's Day only 2 days away, you don't need a ton of time to put these together.

Well actually, that's not entirely true.  The Red Velvet Cream Cheese Truffles required baking in order to make the Red Velvet Cream Cheese-iced treats. 

RED VELVET CREAM CHEESE TRUFFLES


The recipe for the Red Velvet Cream Cheese Swirl Bars can be found here.  You'll need these in order to make the Red Velvet Cream Cheese Truffles.

DIRECTIONS:

Melt down whatever chocolate you want to use to create the shell for these truffles (ie; milk chocolate, dark chocolate, white, etc...).  Be sure to use baking chocolate as it will melt and coat the truffles best.  I use Callebaut morsels.  They're on the pricey side but so worth it.

Mix red velvet cream cheese swirl bars together in a large bowl. But do NOT overmix.  You still want to be able to see the cream cheese bits.  Using a tablespoon-sized scooper, scoop out some of the mix into the melted chocolate.

Use a fork to remove the truffle from the chocolate and place it on wax paper to harden.  Once the batch is done you can allow them to chill in the fridge.  If you want afterward, melt some additional chocolate and drizzle on top of the truffles to make some fun designs.


VALENTINE'S COOKIE TRUFFLES


These are so easy to make you don't even have to bake!  They just require a little bit of love and patience (so they come out all pretty :)

Again, recipe and directions for the Oreo Cookie Truffles are here

Saturday, February 11, 2012

Red Velvet Cream Cheese Swirl Bars

A great Valentine's treat right here.  What a great excuse to bake more goodies.  This is a new recipe for me; never made anything "red velvet".  Can you believe it?

Of course there are more I want to get to (cookies, truffles, cheesecake...nom, nom, nom), but frankly I don't know that I have the time before Tuesday comes around.

Regardless... here are the red velvet cream cheese swirl bars.  Recipe is courtesy of Big Fat Baker.  When I saw those pictures I caved immediately.  Weak in the knees.  Mixing two of my favorite things: cream cheese and brownies.  OY!

RED VELVET CREAM CHEESE SWIRL BARS


INDREDIENTS:

Bar layer:
1 stick unsalted butter, melted
1 cup sugar
1 tsp pure vanilla extract
1/4 cup unsweetened cocoa powder
1/8 tsp salt
1 tbl red food coloring
1 tsp white distilled vinegar
2 large eggs
3/4 cup all-purpose flour

Cream cheese layer:
8 oz. cream cheese
1/4 cup sugar
1 egg
1/2 tsp pure vanilla extract


DIRECTIONS:

Preheat oven to 350 degrees.  Line 8"x8" baking dish with parchment paper or foil and spray with cooking spray.

In medium bowl, combine melted butter with sugar and mix well.  Add vanilla, cocoa powder, salt, food coloring, and vinegar in that order, mixing between additions.

Whisk in the eggs one at a time, mixing well between each.  Fold in the flour.  Pour all batter excet 1/4 cup into prepared baking pan.

To make the cream cheese layer, blend together the cream cheese, sugar, egg and vanilla.  Spread the cream cheese on top of the brownie batter.  Drop dollops of remaining brownie batter over cream cheese layer.  Using a knife, swirl through the cream cheese mixture to create a swirl pattern.

Bake for 30 minutes in preheated oven and cool completely before cutting into squares.


PERSONAL NOTES:

While these dessert bars taste wonderful, they didn't turn out like your typical fudgy brownie.  These ended up more cake-like.  So just know when you get started that this is what to expect.  They're still super moist and chewy, just not as dense as a brownie.

Up next... I use some of these red velvet cream cheese swirl bars to make cake truffles!  NOM NOM NOM!

Wednesday, February 1, 2012

Chocolate Swirls

These Chocolate Swirls are not as tasty as the Marble Cookies were that I made for the holidays.  They're not bad, they taste fine, but I'm not crazy about the consistency of them.  They seem a little chewier than they ought to be. 

CHOCOLATE SWIRLS


INGREDIENTS:

  • 1/2 cup butter, softened

  • 1/2 cup packed brown sugar

  • 1/2 cup white sugar

  • 1 (3 ounce) package cream cheese

  • 1 egg

  • 1 teaspoon vanilla extract

  • 2 cups all-purpose flour

  • 1/2 teaspoon baking powder

  • 1/4 teaspoon salt

  • 1 cup semisweet chocolate chips, melted


  • DIRECTIONS:

    Preheat oven to 350 degrees F (175 degrees C).


    In large bowl, cream together butter, brown sugar, and white sugar until smooth. Beat in cream cheese, egg, and vanilla. Combine flour, baking powder, and salt; mix into creamed mixture to form a soft dough. Fold in the melted chocolate until the dough is just marbled. Do not over mix. Drop dough by heaping teaspoons onto ungreased cookie sheets. Cookies should be about 2 inches apart.

    Bake for 10 to 12 minutes in the preheated oven, or until edges are light golden brown. Cool completely before storing.

    PERSONAL NOTES:

    I used a mini ice cream scooper (the size about 1 tbls) to scoop the batter onto the cookies sheet.  It's just easier.  I highly recommend investing in one of these; they come in mighty handy.

    Tuesday, January 24, 2012

    Chocolate Chip Cream Cheese Muffins


    Chocolate Chip Cream Cheese Muffins?  Yeah, there was no way I was avoiding these guys.  Holy Moly - they're yummy.  The muffins are very light and fluffy - almost cake-like.  The amount of chocolate chips is just the right amount - not too overpowering.  And that's coming from someone who LOVES chocolate.  This was perfect. 

    At first I was a little unsure because the dough seemed a little bit on the gummy side - like it had too much flour in it or something, but really, they came out just fine.  Even the next day the consistency and freshness remained unsullied.  So wonderful.  In terms of grabbing this and eating on the go, they're probably better than some of the of the other muffins I've made.  There's nothing sticky on the tops to create a mess (like if you put one in a sandwich bag for "on the go").  They're just easy.  And the batch only took about 10 minutes to whip up.  Easy all around.  Plus, they're only about 160 calories each!

    You can find the original recipe here from allrecipes.com


    INGREDIENTS:

  • 1 (8 ounce) package cream cheese, softened

  • 1/4 cup butter, softened

  • 1 egg, room temperature

  • 1/2 cup cream

  • 1/2 teaspoon vanilla extract

  • 2 cups all-purpose flour

  • 1/2 cup white sugar

  • 3 teaspoons baking powder

  • 1/2 teaspoon salt

  • 1/3 cup semi-sweet chocolate chips


  • DIRECTIONS:

    Preheat oven to 400 degrees F (200 degrees C). Lightly grease 12 muffin cups or use paper liners.

    Beat cream cheese and butter together until fluffy. Beat in egg, cream and vanilla. Combine the flour, sugar, baking powder and salt. Stir flour mixture into cream cheese mixture until flour is moistened. Fold in chocolate chips. Spoon batter into prepared muffin cups filling them 3/4 full.

    Bake in preheated oven until tops are golden, about 20 minutes.

    Makes 12 muffins*
    PERSONAL NOTES:

    As I mentioned above, you really don't need to smother the muffins in chocolate chips. They have just enough in what the recipe calls for. Also, I used skim milk where it called for cream and Egg Beaters for the egg. YUM!

    *Actually, they made more like 14...

    Friday, January 20, 2012

    Pumpkin Streusel Muffins

    Back in early December, I went to dinner with a girlfriend of mine for some good Japanese food.  While I love Japanese in general, my friend went on to insist that I try the tempura cheesecake for dessert.  Really??? Fried cheesecake?  I know that somewhere in the middle of the country people are already frying up sticks of butter, but did I really want to have tempura cheesecake? 

    Yes, I really did need to try the tempura cheesecake. It was outrageous.  It was warm, it was creamy and cheesecakey with a typical (and yes, absolutely delicious) tempura shell.

    The reason I bring up the tempura cheesecake is because when I tried these Pumpkin Streusel Muffins, the inner cream cheese filling reminded me of the tempura cheesecake.  You really need to try it to know what I'm getting at.  And while the muffins are good at room tempurature, they are MUCH better warmed up.  Then again, most things are...right?

    So here's the next muffin experimentation.  The original recipe can be found here from allrecipes.com.  It was pretty easy to make.  The combination of flavors - pumpkin and cream cheese - and textures - brown sugar and moist cake - make this a hit. 

    PUMPKIN STREUSEL MUFFINS


    INGREDIENTS:

  • 1 3/4 cups all-purpose flour

  • 1/2 cup sugar

  • 3 teaspoons baking powder

  • 1 teaspoon ground cinnamon

  • 1/2 teaspoon salt

  • 1/2 teaspoon ground nutmeg

  • 1 egg

  • 1/2 cup milk

  • 1/2 cup canned or cooked pumpkin

  • 1/3 cup vegetable oil

  • 1 (3 ounce) package cream cheese, cut into cubes


  • STREUSEL:
     
  • 1/4 cup packed brown sugar

  • 1/2 teaspoon ground cinnamon

  • 1 tablespoon cold butter

  • 1/4 cup finely chopped nuts


  • DIRECTIONS:
    In a large bowl, combine the flour, sugar, baking powder, cinnamon, salt and nutmeg. In another bowl, beat the egg, milk, pumpkin and oil. Stir into dry ingredients just until moistened. Fill greased or paper-lined muffin cups one-fourth full. Place one cream cheese cube in the center of each muffin cup; top with remaining batter. In a bowl, combine brown sugar and cinnamon; cut in butter until mixture resembles coarse crumbs. Add nuts. Sprinkle over batter. Bake at 400 degrees F for 18-22 minutes or until a toothpick comes out clean. Cool for 5 minutes before removing from pan to a wire rack.


    PERSONAL NOTES:
    When adding the cream cheese to the muffins, I used reduced fat.  Plus, I added 1/2 egg and 1 tsp sugar and blended them till creamy.  I felt it added a little extra "umph" to the mix.
     
    I also substituted unsweetened applesauce for the oil.  Actually, I used 1/4 cup applesauce plus 1 tbls.  Then added 1 tbls oil.  For some reason muffins come together much nicer if it has even a little bit of oil.  So I add just that small amount. 

    The streusel topping became rather gooey when baked.  A lot of it stuck to the pan which made me soak it for some time before scrubbing it off.  But by then it wiped clean pretty easily.

    Saturday, January 14, 2012

    Cookie Experiment: Oreo Cheesecake Truffle Cookies


    Yes, I do sometimes sit around wondering how to improve my favorite cookie recipes. Or even the ones that aren't my favorite to make them better in general. But this recipe here brings together 2 of the better cookies from this past holiday season. Oreo Cheesecake Cookies and Cookie Balls. It's not all that complicated. I literally brought the two together to create:

    OREO CHEESECAKE TRUFFLE COOKIES

    INGREDIENTS (For the Oreo Cheesecake Cookies):
    ½ cup unsalted butter, at room temperature
    3 ounces cream cheese, at room temperature
    1 cup granulated sugar
    1 teaspoon vanilla extract
    1 cup all-purpose flour
    1 cup Oreo cookie crumbs

    DIRECTIONS:

    Line a baking sheet with parchment paper and set aside.

    In a mixing bowl, cream together the butter and cream cheese on medium speed until smooth and well-combined.

    Add the sugar and vanilla extract and mix until the ingredients are well-combined. Add the flour and mix on low until the flour is incorporated.

    Scoop the cookies into about 1½ to 2″ balls and then roll in the cookie crumbs. Place the cookie balls on the baking sheet.


    OREO TRUFFLE INGREDIENTS:

    1 (16 ounce) package Oreo cookies , crushed
    1 (8 ounce) package cream cheese , softened
    DIRECTIONS:

    Using a blender or hand held mixer, mix Oreos and cream cheese together.  Chill for one hour.
    To combine cookies and truffles...
    Preheat oven to 375 degrees.
    Scoop 1 tbls cookie dough and scoop 1 tsp Oreo truffle mix.  Place the truffle mix in the middle of the cookie dough and roll so truffle mix is completely covered.  Place the Oreo cookie crumbs in a small bowl. Roll dough in the Oreo cookie crumbs and place on cookie sheet. 
    Bake for 12 to 15 minutes, or until the edges are golden and the tops are slightly puffed. Cool on the pan for 2 minutes before transferring to a wire rack to cool completely. Store in an airtight container.
    YUM!!!