Wednesday, February 29, 2012

Cheesy Quinoa Bites

YUM!  These are so yummy!  Overall, they're pretty easy to make.  The most work involved came when shredding the carrots, the cheese and slicing the scallions.  You know, I thought it would be easier for me to use my food processor but it wasn't.  Then again, my food processor decided to poop out on me.  So it took me time trying to wedge the blade up (oh yes, it was stuck good) and pick out all the food that got jammed in all the plastic bits.  Ugh. 

Had my 15 year-old food processor not cracked (actually it's the detachable stem which I just discovered the company no longer makes.  That's what I get for having an ancient processor.  Bummer.) things would have gone better I'm sure. 

That all said, I came across this recipe for Cheese Quinoa Bites and of course had to try it.  I absolutely LOVE quinoa.  It's safe to say I'll try almost any quinoa-related dish.  It's versatile, easy to make and good for you!  Long gone are the days of eating couscous for me.  Quinoa just makes me feel better after I've had it.

Anyhow...

CHEESY QUINOA BITES


INGREDIENTS:

  • 2 cups cooked quinoa

  • 2 large eggs

  • 1 cup shredded carrot

  • 2 stalks green onion, diced

  • 2 cloves garlic, minced

  • 1/4 cup chopped fresh cilantro

  • 1/2 cup grated Parmesan cheese

  • 2 Tbs all-purpose flour

  • 1/2 tsp seasoning salt

  • 1/4 tsp freshly ground pepper


  • DIRECTIONS:

    Preheat oven to 350 degrees.

    Mix together quinoa, carrot, egg, green onion, garlic, cilantro, cheese, flour, salt and pepper.
    Distribute mixture into a greased mini muffin tin, filling each cup to the top (1 heaping Tbs each).  

    Bake for 15-20 minutes.


    PERSONAL NOTES:

    As I said, these are delicious!

    I ended up adding 1/2 cup shredded Monterey Jack cheese to see what would happen (also because I have it on hand and need to get rid of it).  It came out great.

    I'll definitely be making this again.

    Tuesday, February 28, 2012

    Scalloped Potatoes

    In an effort to use some potatoes I had lying around, I found this recipe to make scalloped potatoes.  As it turned out, I had all the ingredients.  Well...kind of had the ingredients.  Actually, I had to substitute some things because I didn't have everything the recipe called for.  I'll explain in a little bit...

    SCALLOPED POTATOES


    INGREDIENTS:
  • 2 tablespoons butter

  • 3 tablespoons all-purpose flour

  • 1 teaspoon salt

  • 1/4 teaspoon pepper

  • 1-1/2 cups fat-free milk

  • 1/2 cup shredded reduced-fat cheddar cheese

  • 1-3/4 pounds potatoes, peeled and thinly sliced (about 5 medium)

  • 1 medium onion, halved and thinly sliced


  • DIRECTIONS:

  • In a small nonstick skillet, melt butter. Stir in the flour, salt and pepper until smooth; gradually add milk. Bring to a boil. Cook and stir for 2 minutes or until thickened. Remove from the heat; stir in cheese until blended.

  • Place half of the potatoes in a 1-1/2-qt. baking dish coated with cooking spray; layer with half of the onion and cheese sauce. Repeat layers.

  • Cover and bake at 350° for 50 minutes. Uncover; bake 10-15 minutes longer or until bubbly and potatoes are tender.


  • Yield: 6 servings.

    PERSONAL NOTES:

    Well... a few things:  As I was preparing to make this dish, I discovered I had no more flour.  NONE.  So I had this idea of using ground cornmeal as a substitute.  The same stuff I use to make polenta. 

    Then I used fat free half and half because I had it on hand.  And instead of using cheddar cheese (because again, I had none), I chose to use Monterey Jack cheese.  Then I doubled the amount of cheese. 

    Finally, for the onion I used a bunch of scallions.  Again, I used them because I had them. Oh, the potatoes.  I used 2 new potatoes and 2 sweet potatoes.  As I said, these were all items I had on hand. 

    As I was mixing the milk/cheese sauce I noticed that the mixture was super soupy.  So I added in another tablespoon of cornmeal.  Then once it thickened, it thickened in a serious way.  Like, maybe I shouldn't have used that extra tablespoon of cornmeal.  Anyway... I put the whole kit and caboodle together and it looked great. 

    Once it baked up, the sweet potatoes and cornmeal gave it a golden/orange color.  And while the sauce thickened to a cornbread-like consistency, the whole dish tasted great.  So, I'm not sure these would pass as your traditional scalloped potatoes, but they are really delicious.  My husband tested them too and liked them.  I'll be making these again.

    Sunday, February 26, 2012

    Artichoke, Kale & Ricotta Pie

    If you've been following my posts for any length of time you'll see the ridiculous amount of dessert dishes I make.  It's just not normal.  After all, it's just me and my husband at home.  I'm not feeding a family or an army.  I just get swept up in the recipes and visions in my head of all these heavenly delights.  You know what that leads to?  Me feeling like poo when I've eaten too much of it. 

    For the record, I don't eat all of it. Far from it.  I bring a large chunk of what I make to whatever yoga studio(s) I'm teaching at that day.  Luckily for me, not every yogi is into a strict vegetarian (healthy) diet.

    That said, I'm seeking to go back to a more mindful and healthy way of eating.  Granted, I have to clear the fridge and cabinets of whatever leftover supplies I used, but I'm getting back on track.  And what better way to do both than with this next recipe for Artichoke, Kale and Ricotta Pie.  (Original recipe is found here).

    By the way, it's cooking right now and smells absolutely sinful!

    ARTICHOKE, KALE & RICOTTA PIE

    INGREDIENTS:
    Olive oil
    4 eggs, beaten
    8 ounces ricotta cheese
    4 ounces Parmesan, grated
    1 cup canned artichokes, chopped
    1 bunch kale, roughly chopped


    DIRECTIONS:
    Preheat oven to 400°F. Grease a 9-inch cake pan lightly with olive oil. In a large bowl, whisk together the eggs and cheeses. Roughly chop the veggies and add to the cheese/egg mixture. Stir until combined. Pour contents of bowl into the greased cake pan and cook until custard is set, about 40 to 50 minutes. Cool on a wire wrack for 5 to 10 minutes and serve.


    PERSONAL NOTES:

    This pie didn't need to be in the oven as long as the directions state.  I left it in for 40 minutes and checked; it was more than ready to come out.  Next time I make this (and I will be making it again because it turned out delicious!) I'll check it at 30 minutes and possibly lower the temperature to about 375 degrees.

    As far as the flavor goes, I like putting garlic and onions in almost everything I make and this was no exception.  However, I discovered I ran out of fresh garlic.  Boo.  Happily, I have a good amount of onions on hand so I decided to thinly slice up a couple of shallots.  Hooray!

    So even though it cooked a little longer than I would have liked, it still came out fantastic.  My husband gave it his two thumbs up as well!

    Saturday, February 25, 2012

    Slutty Brownies. You just gotta have them.

    Any recipe called "Slutty Brownies" is going to get your attention.  It did mine.  When I saw the pictures I was instantly hooked.  It has 3 of my favorite things: brownies, chocolate chip cookies and Oreos!  Hel-lo!

    By the way, finding this recipe kinda falls into the category of "Why Didn't I Think of This Before?"  It's true.  For someone as creative as myself I really have no excuse as to why I hadn't come up with something like this.  It's genius.
    Just take a look at them, looking all sexy lounging on the plate.  They're asking for it!

    SLUTTY BROWNIES


    INGREDIENTS:

    For the brownie layer:

  • 10 Tablespoons Unsalted Butter

  • 1-¼ cup White Sugar

  • ¾ cups Cocoa Powder

  • ½ teaspoons Salt

  • 2 teaspoons Vanilla Extract

  • 2 whole Eggs

  • ½ cups Flour


  • For the cookie dough layer:

  • 1 cup Butter

  • ½ cups Brown Sugar

  • 1-½ cup White Sugar

  • 2 whole Eggs

  • 2-½ teaspoons Vanilla extract

  • 2-½ cups Flour

  • 1 teaspoon Salt

  • 1 teaspoon Baking Soda

  • 1 teaspoon Baking Powder

  • 2 cups Semi-Sweet Chocolate Chips

  • 1 package Oreo Cookies, 15 Ounce Package


  • DIRECTIONS:

    For the brownie layer:

    In a medium-sized sauce pan, melt the butter over medium high heat. Add the sugar and cocoa powder once the butter is melted. Whisk to combine and remove from heat. Add the salt, vanilla and eggs and continuously whisk until the eggs are combined. Add the flour and continue to mix. Set batter aside.
    For the cookie dough layer:

    Cream together the butter and sugars using a mixer. Add the eggs and vanilla, making sure to scrape down the sides of the mixing bowl. Add the flour, salt, baking soda and baking powder and mix on low until everything is incorporated. Fold in the chocolate chips. Set dough aside.

    For the assembly:

    Preheat the oven to 350 F.

    Line the bottom of a 9×9 baking pan with tin foil and then spray the tin foil with a layer of baking spray.

    Layer half of the cookie dough on the bottom of the prepared baking pan, pressing down to form the bottom of the Slutty Brownies. Reserve the remaining cookie dough to be used to make cookies later in the day.

    Layer as many Oreos as you can on top of the cookie dough. No need to overlap. One single layer will do.

    Pour the brownie batter on top of the Oreo layer and make sure it’s spread evenly on top.

    Bake for 30-35 minutes. Test with a knife to see if the center is done. If the knife comes out clean, then remove the pan from the oven and let the brownies rest before serving. If the knife comes out with batter still on it, allow the brownies to bake about 5 minutes more.

    Serve with ice cream!


    PERSONAL NOTES:
    As per usual, I had to change things up.  Not intentionally, but more out of necessity.  I didn't have enough butter.  So when it came to making the brownie layer I only had 4 tablespoons of butter.  To compensate, I used 2 tablespoons of Olivio butter substitute and 4 tablespoons (1/4 cup) apple sauce.  Wonderful.  And I also used Egg Beaters instead of regular eggs.  Just a little way to cut down on the cholesterol and saturated fat. 

    By the way, these are absolutely delicious.  They're gooey and decadent.  Just the way nature intended ;')

    Friday, February 24, 2012

    Honey Beer Bread.

    So what do you do when you have food items you want to get rid of?  You look for recipes using those same items!  And that is how this next recipe came about.  It's a simple, easy to make bread.  It uses no yeast so you don't have to wait for it to rise.  You can tell by the pictures that even without the yeast, it had no problems rising pretty high! 

    The taste?  In a word: YUMMY!  I know this sounds silly, but you can really taste the beer and the honey together.  It's such a nice flavor combination.  Actually, I thought it was a rather interesting taste; biting into a piece of fresh bread and encountering the unmistakeable beer flavor, softened slightly by the honey.  So good.

    And of course, the original recipe can be found here.  Well done!

    HONEY BEER BREAD


    INGREDIENTS:

  • 3 cups all-purpose flour

  • 2 Tbsp. sugar

  • 1 Tbsp. baking powder

  • 1 tsp. salt

  • 2 Tbsp. honey or agave nectar

  • 1 bottle (12 ounces) beer

  • 4 Tbsp. (half stick) butter, melted (**You can double this if you’d like**)


  • DIRECTIONS:

    Preheat the oven to 350 degrees F. Grease a 9″ x 5″ x 3″ inch loaf pan.

    In a medium bowl, whisk together the flour, sugar, baking powder and salt. Using a wooden spoon, stir the beer and honey into the dry ingredients until just mixed. (I recommend popping your honey in the microwave for a few seconds beforehand to make it easier to stir in!)

    Pour half the melted butter into the loaf pan. Then spoon the batter into the pan, and pour the rest of the butter on top of the batter. (Use a pastry brush to spread it around if you’d like.)

    Bake for 50 to 60 minutes, until top is golden brown and a toothpick/knife inserted in the middle comes out clean. Serve immediately.


    PERSONAL NOTES:

    I ended up using only 2 tablespoons of melted butter which I put into the dough directly.  You can brush the top of the dough with the butter as the directions suggest, but I didn't see any difference from when I used the butter on top from when I didn't (yes, I made the bread twice :)

    As I said, it's super easy to make and just delicious.  Especially warm!

    Thursday, February 23, 2012

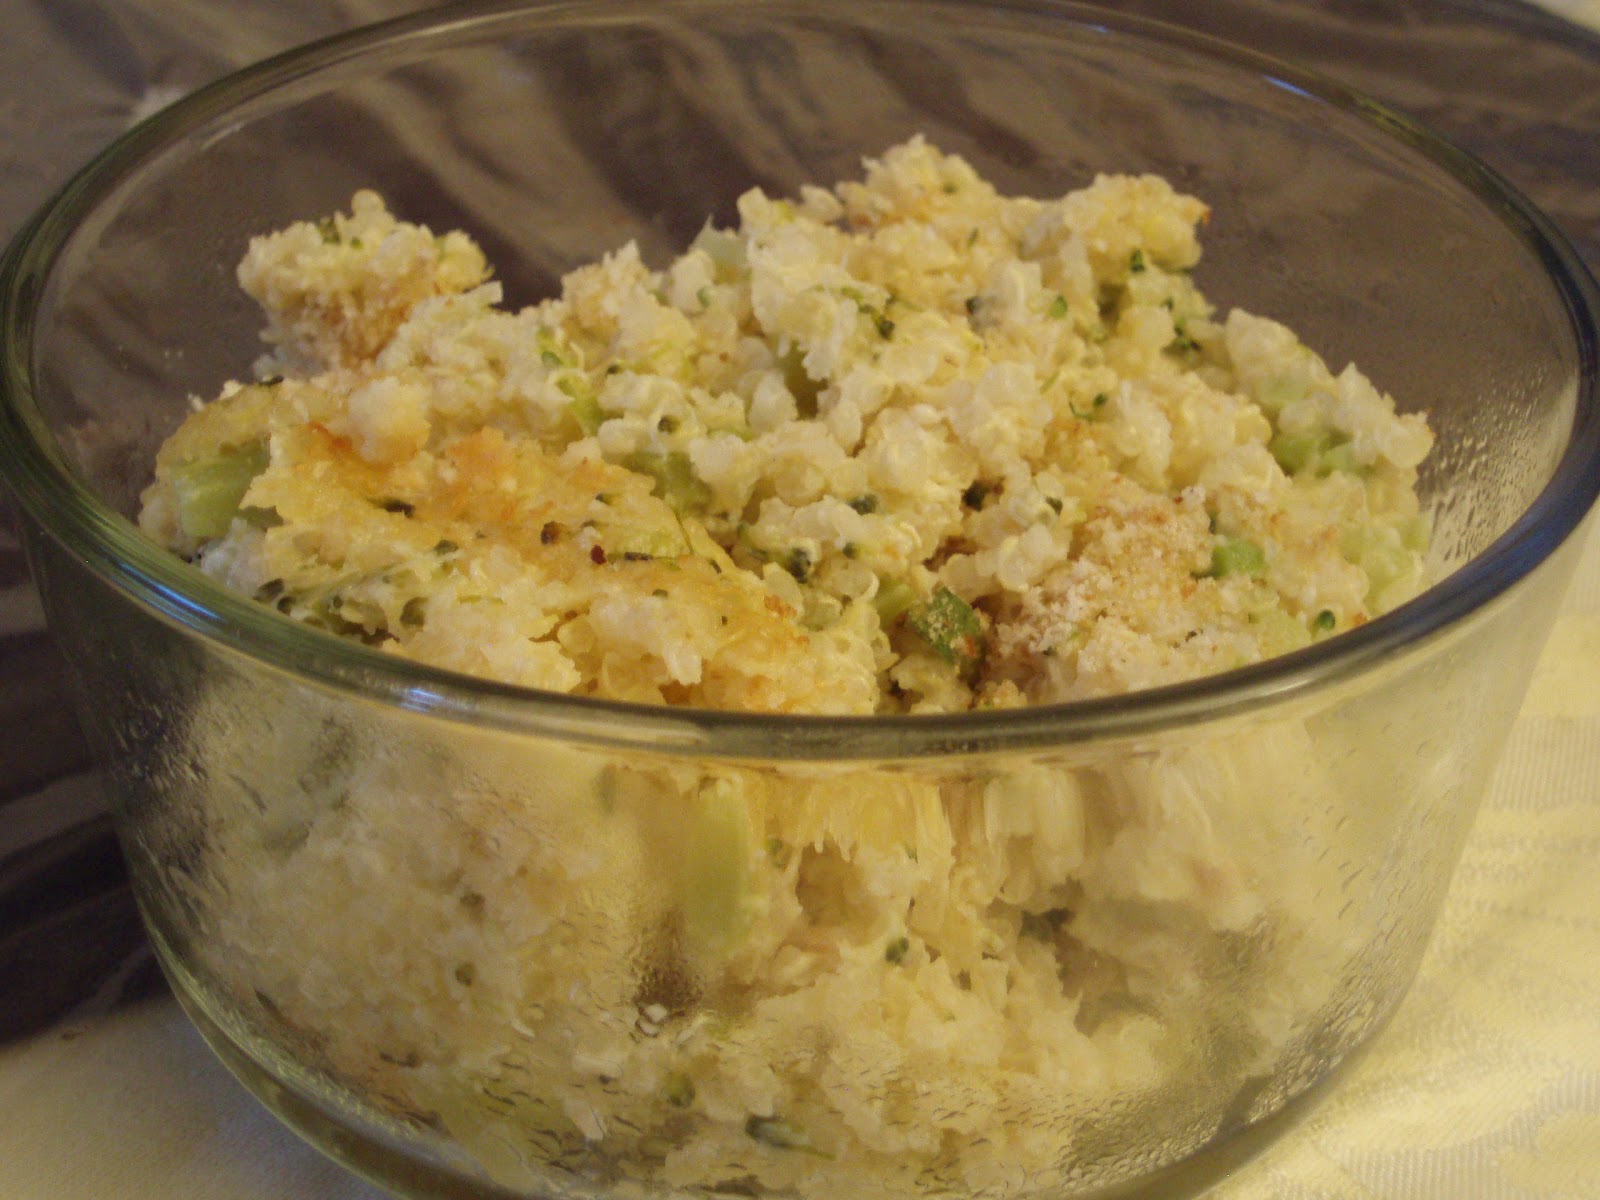
    Baked Quinoa and Cheese

    You got that right. Baked QUINOA and cheese. Delicious AND (a little bit more) healthy.

    Again, I have to credit the peeps at Pinterest for this recipe. Although of course, I re-modeled it to fit my needs :)

    This a great dish to make if you want to have lunch ready for the week or for leftovers.  If you have a family, this might go pretty quick.  It makes 8 servings but you may want seconds.  It's super easy to make too.  Just bring together all the ingredients and bake.  Plus, using quinoa instead of pasta adds a different dimension to it (as well as protein!).

    YUM!

     
    BAKED QUINOA AND CHEESE


    INGREDIENTS:


  • 1 1/2 cups quinoa, rinsed and drained

  • Veggies of your choice (optional)

  • good pinch of salt

  • a few grinds of seasoning salt

  • 2 cloves garlic, minced

  • 2 large eggs

  • 1 cup soy milk or non-fat milk

  • 1 1/2 cups grated Cheddar cheese, more for sprinkling

  • Optional- Crushed Red Pepper, Panko Bread crumbs for topping

  • Toppings (optional)- salsa, hot sauce, sour cream, scallions


  • DIRECTIONS:

    Lightly saute any veggies you would like in this dish.

    Cook quinoa to packaged instructions until fully cooked. (About 15 minutes)

    Preheat oven to 350 F. Coat 13x9 inch dish( or 8 individual ramekins) with cooking spray.Whisk together eggs and milk in large bowl. Fold in quinoa mixture and cheese. Stir very well and let some of the cheese melt. Transfer to prepared baking dish and if using Panko Crumbs or Bread crumbs add now and bake 30-35 mins, until bread crumbs are browned.

    PERSONAL NOTES:

    I thought the idea of adding vegetables was great.  Since I had some frozen chopped broccoli on hand I decided to add that.  Now, the recipe says any vegetable and that you can lightly saute them.  I went with what was quick.  At first I thought the 10oz package of broccoli would be too much, but it turned out perfectly for the amount of quinoa I made. 

    Also, I didn't have cheddar so I used Monterey Jack cheese.  Frankly, it tastes fine.  Better than fine, actually.  But I think deep down, cheddar would probably be the way to go.  The Monterey Jack cheese is just milder.  Although the texture is still creamy.

    Oh, and I decided to add 1/4 cup Parmesan cheese.  Since the flavor was mild without the cheddar, I thought (and rightly so) the Paresan would add a little more kick. 

    Wednesday, February 22, 2012

    Snickerdoodle Muffins. Oh yeah.

    There's something about cinnamon and sugar together that makes me smile.  Actually, I smile about a lot of different food combinations but these two take me back to my childhood.  To the good things in my childhood.  It's probably safe to say I'll always enjoy these two flavor combinations. 

    Naturally, this looked too good to pass by when I saw it on Pinterest.  Ever since I joined that site a couple weeks ago, I cannot stop trolling for all kinds of yummy goodness that people have to share.  A lot of what I find I call "food porn".  It's just that good - at least to look at.  That said, I had to give this recipe a test drive. 

    I've made snickerdoodle cookies and blondie bars so it only makes sense to try these guys out too.

    Original recipe can be found here. 


    SNICKERDOODLE MUFFINS


    INGREDIENTS:

  • 2 ¼ cups flour

  • 3/4 teaspoon baking powder

  • 3/4 teaspoon baking soda

  • 3/4 teaspoon cream of tartar

  • 1/2 teaspoon nutmeg

  • 1/2 teaspoon salt

  • 2 sticks (16 tablespoons) unsalted butter, softened

  • 1 cup sugar

  • 2 large eggs

  • 2 teaspoons vanilla

  • 1 cup sour cream

  • 1/4 cup buttermilk

  • For the Topping:
    • 2/3 cup sugar
    • 2 tablespoons cinnamon
    DIRECTIONS:
    Preheat the oven to 350ºF. Line muffin cups with muffin liners. (Do not use cooking spray.)
    In a large bowl whisk together flour, baking powder, baking soda, cream of tarter, nutmeg, and salt; set aside.

    In the bowl of a stand mixer fitted with the paddle attachment, cream the butter and sugar until light and fluffy, about 3 minutes. Add eggs, one at a time, beating well after each addition. Beat in vanilla extract. Beat in half of the dry ingredients. Beat in the sour cream and buttermilk. Beat in remaining dry ingredients until just incorporated (batter will be soft).
    To make the topping, in a small bowl, combine the sugar and cinnamon.

    Using an ice cream or large cookie scooper, drop the scoop of batter into the bowl with the sugar and cinnamon. Sprinkle the dough with the mixture and roll it around until it is covered completely in cinnamon sugar. Place the ball into the muffin liner. Repeat with remaining batter. Sprinkle the leftover cinnamon sugar onto the tops the muffins.

    Bake until muffin tops are golden brown, 18 to 22 minutes, or until toothpick inserted into the center of a muffin comes out with a few moist crumbs attached. Set on wire rack to cool slightly, about 5 minutes. Remove muffins from tin and serve warm.

    Makes 16 muffins.

    PERSONAL NOTES:
    I made a few changes to these.  For starters, I didn't have any buttermilk so I improvised. In place of the buttermilk I used cream cheese.  It worked out great!  The muffins are still light, fluffy and soft.

    The directions state to drop scoops of batter into the cinnamon/sugar mixture but I found this very difficult.  I dropped in a scoop and it kinda went all over the place.  So instead, I scooped batter into the paper liners then I scooped smaller amounts of cinnamon/sugar and placed them on top of the batter.  I made sure the batter was covered and that was that.  I put them in the oven.  Of course, coming out the other end, some of the sugar topping baked off onto the muffin pan.  It made it a little challenging to clean, but no big deal otherwise.  The muffins looked and tasted great.
    Oh - I also substituted brown sugar for the granulated sugar.  I like it better that way.